Thank you very much for your support. I was shocked when I Googled for 'volvo 240 speedometer sensor' and the first result is 'VOLVO 240LIVE!'....I would like to thank all of you, visitors and supporters who frequently visit this blog. There is no better word for me to express "THANK YOU VERY MUCH"....
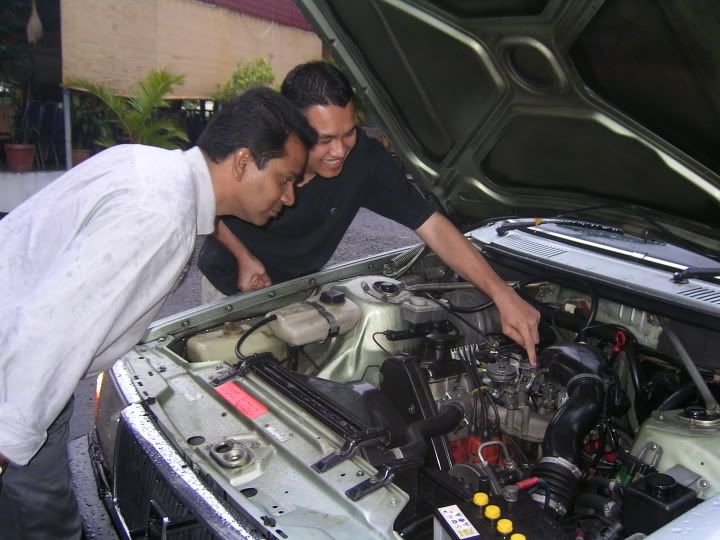
Short note on the location of the Speedometer Sensor and its' wiring harness on the rear axle. It will be better to check this part first if the speedometer and odometer do not function at all; check for wire conditions, ensure socket is intact. Below is how the sensor look alike.
Last week I got a call from a friend, asking to check for his speedometer. His 1991 240SE's speedometer did not work since he bought the car. I forgot to ask about the odometer, but theoretically, odometer might also stopped. I haven't checked his car yet, but from that day I was very curious to know how could I check for speedometer signal transmission from the rear axle to the circuit board is OK. This is because it was quite popular that I heard on 940s, and some 240s that the connections at the rear axle had ruptured.
I have done the measurement on the 240 I drive. You guys might want to do this first if your speedometer do not work. It might just be bad connections from the sensor rather than a broken instrument board. Steps to dismantle the instrument cluster may be referred from this link (http://www.hyperocity.com/volvo240/volvoodometer.htm).
See below illustration. After the instrument cluster got removed, find for the 3 wires with L-shape connector as shown in the picture. Note that wire color codes have been changed in later models, however it still serve the same purpose.
Then, using an analog multimeter (can use any type of multimeter, even an oscilloscope), connect the -/COM lead to the BLACK wire terminal, and the + lead to the BLUE wire. Note that the RED wire supply voltage for the board, because we are not connecting the board, leave it. BLUE wire is transmitting signals from the speedo sensor.
I set my multimeter to read AC voltage as follows;
Start the car, and get moving, slowly. You should be able to see the multimeter readings increasing with the speed of your car. This indicates that the signals from the speedo sensor at the axle was fine. If with this condition, still the speedometer do not work, I suspect the instrument board itself must be checked.
Another DIY session to share with. It has been months since the driver side power window gave some musical beat when it was in motion. It sounds like this; 'tak...tak...tak...' and it seems that its getting slower and hard to move. See the below video to listen the 'tak...tak...tak...'. Until one morning last week, the power window can barely wind-up, I decided to get it serviced that evening. Here is the details of how I got it serviced (and the door lock too).
Below is the step-by-step of what I did, from dismantle the door panel, until showing up the power window parts needed to be service. Equipments & tools needed are just flat and philips screw driver, 10mm spanner, and the good WD40. Don't forget to have piece of rag with you to clean up the things.
1-REMOVE TRIM
Remove the door lock trim by squeeze it up a little bit. The lower part will then be disengaged from the panel. The same should be done to the upper part (squeeze down a little bit).
This is how it looks like after the trim removal.
2-REMOVE DOOR POCKET
Notice the location of the flat type plastic pins. There are 3 such pins altogether at the lower part of the door pocket. Remove them by using a flat screw driver and turn until 90 degrees only. Keep them in safe place.
Gently push up the end of the door pocket. This may be hard, especially if this is the first time. But believe me, it can pry out when you push it up from the screw holder. Just a bit patient and don't knock it hard from the below side. The illustration above gives exactly how your hand should be placed when prying up the door pocket off from the screws. Do this for both right and left ends.
Once the prying up successfully done, turn the door pocket about 45 until 90 degrees as shown above. This will help to disengage the center hold from the door panel.
Then remove both right and left philips screws. Again, keep them is a safe place.
3-REMOVE ARM REST & POWER WINDOW UNIT
Using small flat screw driver, pry off gently the screw covers, 2 of them.
Using a philips screw driver, unscrew the arm rest holding screw. There are 3 of them. Again put them in a safe place. At this level, the arm rest is detached from the door panel, however the upper holder is still hanged on to the panel. Let it be there for a moment.
Lift the power window switch unit to the right. This will detach the unit from the arm rest.
To completely remove the arm rest, slowly turn it as shown above until approximately 90 degrees. You may want to slowly pry it off from the door panel while turning the arm rest unit. The locking mechanism of this arm rest can be seen and self-explained after you got it off.
The next step is to remove the power window unit wire sockets. You may want to jot down the sockets location for proper re installation later.
4-REMOVE DOOR PANEL
Remove the door knob by turning it in counter clockwise direction.
Using small flat screw driver, run through the door panel to see which part is being clipped. Do this slowly. Caution should be taken as the old door panel might be brittle enough and breaks easily.
Pry off the clips using the small falt screw driver. Do this all around the door panel, and remove all clips.
Then, starting form the right end, lift up the door panel, then slightly to the right. It should glides off easily. Note that carefully take off the power window wire socket one by one through the wiring holes, so that the panel is completely off from the door.
This is how it looks like so far.
To access the power window mechanism, remove the white plastic cover.
5-SERVICE THE POWER WINDOW!!
This is the power window mechanism. The power window motor is located at the most below of the door. You might want to take this chance to tighten up the two 10mm nuts that hold the power window motor. Reinstall the power window switch unit for further test purposes. Power on the ignition key, and test the power window, move it up and down to see where is the flaw.
In my case, the 'tak..tak..tak' sound came from the metal round coil. What I did is just to spray the metal coil with WD40. I used quite a lot of WD40, until brownish residues comes out. Move the power window up and down while spraying the WD40. You might also want to take this chance to apply WD40 on the door lock mechanism as well. Clean up the door area after you have done with the job. Installation is just reverse of removal procedures.
The results?? I got a silent power window moving up and down, also lighter door lock. And very happy with the results. GOOD LUCK :))
Hi all. VOLVO 240 LIVE!! is under some minor 'facelifing' process. Have fun on the new layouts and facelift made. Any suggestions or feedbacks, just leave your feedbacks on this page.
I just changed my center dash bulbs this afternoon. There are 3 bulbs altogether in there that look like the below picture.
OK, lets jump straight to how to replace the instrument bulb. I did these procedures in less than half an hour. If you are a beginner, it may consume more than that, but don't worry, this is just a simple stuff. Here are the procedures. I made in point forms and with some pictures as a guide;
-First, remove screws (philips type) and clips that hold the center dash with the side kick panel for both left and right hand side. I marked them with 'A' and 'B' on the picture. If you are unsure of where these screws and clips are, it was located just under the steering column area and the glove box area.
-Then, remove another 2 screws (philips type) located just below the radio compartmet (if you installed your radio there) or just parallel to the gear stick. I labelled them as 'C' and 'D' on the picture.
-At this point you may bring forward the center dash slowly. It doesn't need to be taken out. All wires attached to it also need not to be disconnected. Just bring the dash forward to allow some room to access those bulbs. Browse trough for BLACK & BROWN wires, they hold the bulb socket. Once you identified the socket, you can just pull it forward out from the dash. Given that there is a lot of wires going around that area, it is best done by using a long nose plier. There are 3 such sockets and bulbs; behind the TEMP knob, behind the FAN SWITCH KNOB, and above the HAZARD BUTTON row. Pull them out of that hairwire area to enable a more comfortable working environment, as shown in the pictures. Again, no need to disconnect any wires!
-Then it is just a straight forward task. Pull the bulb out from the socket. It might be quite tight in there, but not extremely tight. Just use your fingers. Be patient, thats all. Install replacement bulbs and test them by turning on the parking lamp, they should turn on. Then just reassemble everything. Reassemble is just reverse the disassembling process :))
Guys, this is just a guide, of course I may not be able to take pictures on each and every single tiny miny stuffs, common sense is enough. Anything just contact me. GOOD LUCK!!
It was just exactly a month later after I pump-in refrigerant after no-cold aircond as per explained in previous posts, and the air-cond started to acted up back. Luckily, it happened while I am at home, so I can just go to my favourite air-cond man rather than the air-cond guy near my campus.
I told the air-cond man that it was just 1 month time before all gas leaked out. He asked if I have something 'smelly' from the air-cond vent, the answer is NO. If there was some 'smelly' stuff, it may indicate that the cooling coil have leakages. However he insisted that this Volvo 240 cooling coil rarely leaks, but due to old age, nothing is impossible.
He and his assistant proceed to conduct some sort of compression test by putting gas on the system. They read from the pressure gauge that there was a leak. Theay used some soapy foam, apply them all over the hoses to find the leakage but to no avail. The air-cond man then decided to just run the compression test on the compressor only. Confirmed! Compressor got leakages. He recommended me to overhaul the compressor, change all seals, gaskets, and o-rings. They did it in about 2 hours and everything settled.
The main symptom of leaking compressor is that you can always see oil on the magnetic clutch area, and also some oil residue in the engine bay nearby the compressor. Actually this is a recond-unit compressor which I just changed slightly about a year ago, and I know now that the compressor supplied to me is not that good. However, am happy with the air-cond system now! :))
OK, the symptom is simple and could mislead to other problem. The main symptom is when the car is moving at high speed, range from 70km/h and above, and sudden brake is needed, the steering wheel chatters. It was obviously felt that front tyres vibrate vigorously. Brought the car to a mechanic, he test drive the car and insist if nothing is wrong with the brake lines, or anything of the front tyres, then it may be the brake disc itself. However upon checking, he jacked up the car and we found out that the front tyre have some freeplay (when you try to push in and out at the same time, show loseness). Then he suspected it was the tie-rod assembly, both sides. The tie rod assembly is covered under the black protection boot. See figures below. Got them changed, and test drive, YAHOO!! Solved. The logic behind this troubleshooting is that, the other end of the rod is connected to the tyres while the other part (with bearings) connected to the main rod. When we brake, the other end will have to stop while the other end have numerous freeplay that enable it to move vigourously due to the braking force/shock. And remember that an alignment work is needed after tie rod works done.
First of all, in this blog I just want to briefly share my S40 test drive experience. Just to be short and precise. What did I think of S40??
1-In cabin noise in obvious, even my 240 have less noise. This is not a joke. I posted this on a Volvo Club Forum and one of the S40 owner told me that it was because of the factory fitted tyres. He just changed it into another brand and happy with it!
2-Power and responsiveness was great. I love to use the 'Manual MODE' of the shiftronic transmission. Yeah, logic!
3-Ergonomically perfect. This is the most important feature I'll look around with new cars.
4-Handling? I am not sure, but I somehow rather feel that 240 grip the road firmer, 240 have more solid handling though, not to be biased! Maybe S40 is a FWD, while 240 is a RWD with 'live rear axle', maybe...
5-If i got that amount of money, will I buy S40?? At this point of time, maybe NOT. I think better get a Honda Accord or Toyota Camry brand new for cheaper price, not bad performance, comfort also, and the most important part in my judgement is they are bigger than S40...eheheheh....
All in all I think S40 is not for luxuriness, but for sportiness! Good Day :)
I got my aircond gas top-up by a local aircond shop. Reason being is just that it started to feel warm. I recalled that my last service was done on March this year, so its just about eight month of usage. I told the aircond man and suggest that there might be leaks anywhere. Then he told me that if in any case there is a leak; which take almost eight month to diminish the gas, the leak must be a very small leak and no point of him tracing it down as it will be very tiny and difficult to trace. Thus he suggest that we top-up the gas first, and if the gas reduces significantly, then the hunt begins! Paid RM20 for gas top-up...Update later.
In 1998, The Guinness Book of World Records honoured Irv Gordon's Volvo P1800 as the vehicle with the "the highest certified mileage driven by the original owner in non-commercial service". Today, Gordon is breaking his own world record every time he drives his celebrated car.
"Of the 260 million vehicles on the road in the United States, only a handful have accumulated one million miles, and until now, none have made it to two million," said Dan Werbin, president and chief executive officer for Volvo Cars of North America. "We like to say that 'there are cars, and then there are Volvos,' but there is more involved here than the wisdom of our engineers in developing a car that could last so long and travel so far. Irv's meticulous care of his Volvo over the years has played a significant role.'
Ten Tips To Help Make Your Car Last Two Million Miles – by Irv Gordon
1. Start with a car you like. 2. Change your oil and filter regularly. 3. Use factory equipment parts. 4. Use one brand of oil. 5. Spend a few minutes a week checking under the hood. 6. Wash your car regularly. 7. Wax at least twice a year. 8. Develop a good working relationship with your dealer and mechanic. 9. Use gasoline from a high volume station. 10. When your car makes a funny noise, listen to it.
p/s - this post was adapted from VCC Malaysia website.
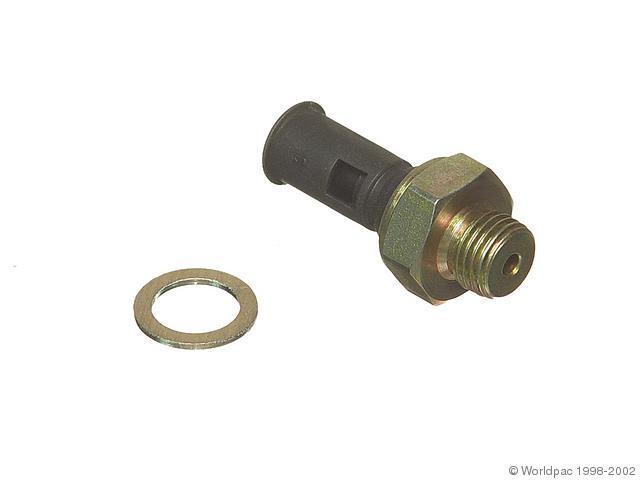
Oil Pressure light went off?? Do not panic. Me and my friend who drives the same 240 faced exactly the same issue past months. First, I thought the bulb itself has blown. But because of time constraint, I just left it like that. Though I know that the oil pressure warning light is important because anything can just happen to your oil engine, be it massive leaking whatsoever. Upon checking around the oil pressure sensor (just beside your oil filter), found out the connecting wires went kaput. It can be obviously seen it was oxidized and getting cut by itslef through time. Simple solution; took it to an auto electrician and connect it back. SIMPLE! The warning light comes back and now I am happy :)
Just for interest, I put here the picture of the oil pressure sensor, yeah it is a simple sensor I think.
OK guys, no car for almost three weeks now. Nice man. Sometimes we have to learn about hardships by experiencing it. We can always symphatise on poor or disabled individuals. I was lucky to experienced the hardship; no money, no car, walk all along under the hot sun, less food, in hunger. Oh Allah, its nice man, really. Try it! Hopefully next week I will drive back the car.
p/s - my dad driving it now..... the below pix was during my very first meet up with Mark1 of VOCM, yeah he drives a B230K also :)
Transmission Calculator! Yeah, this is a very good tool. I used this online calculator to check out what is the maximum speed at certain rpm this car (or any other car can go). It is very simple. Key in the gear ratios, and rear differential ration. Key in also your tyre size and the desired rpm. A graph will be plotted. From this graph, one can obtained how mph the car could get in corresponding rpm. Log in to this site --> http://www.geocities.com/z_design_studio/transmission.html
From http://new.volvocars.com/ownersdocs/1989/1989_240/89240_04.htm#pg99, I obtained full specifications for this 1989 240. The gearbox used for this model is the M47 II (manual transmission) with following gear ratios;
I just put up all the above values, plus the tyre size of 185/70/14, and; rpm of 4000 rpm, the max speed calculated at 5th gear is 106mph or 170.6kmh, rpm of 4500 rpm, the max speed calculated at 5th gear is 119mph or 191.5kmh.
The question is how accurate this calculation will be? Yeah, I am pretty sure this car is able to reach that given that at 3500 to about 3800rpm, it can reach up to 150 to 160 kmh. There are so many lagging factor which contribute to some reduction from those calculated values. It may include the wind drag, engine wear and tear, tyres condition, suspension system and so on so forth. But its good to know that 240 can run that speed :)
Hi guys! Its sad to tell that my hard disk crashed, all VOLVO related pictures, videos, even some pdf documents gone, just like that. OK, for this post, I am going to enlighten on battery terminal placement issue. Tribute goes to Mr Mark for enlightening me on this.
VOLVO 240 originally comes with DIN type of battery. This type of battery basically have lower height of terminals, therefore the chances of getting them short is very low. For this matter also, please take note that the terminal allocation for DIN battery is that, the negative terminal will be beside the fender wall while the positive terminal be beside the air filter box. The main reason between this is that to ensure that if accident occurs, and the fender wall dented into the engine compartment, and hit the battery, they do not shorted because of common ground points between the firewall itself and the negative terminal of the battery. (NOTE:Car body act as ground).
However, the popular NS battery (I have been using now) have reverse polarity allocation of the terminals. This is dangerous as if accident occurs, the fender might get in contact with the positive terminals and they will get SHORTED! This will then produce sparks and some sort of fire likely will occur. Again this is VERY DANGEROUS! Yeah, I am warning myself and you all. As the battery was new, very new, I am planning to cover the terminals and hope for the best. So guys, give extra attention when you change your next battery. GOOD DAY :)
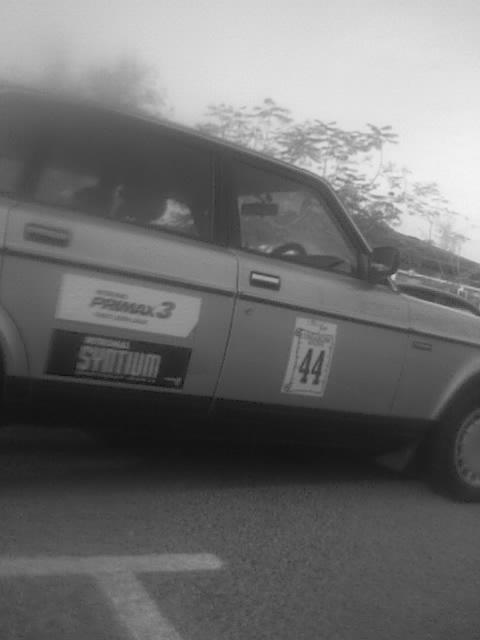
Treasure Hunt experience. This is the first time ever I drive this car into a Treasure Hunt. The most scary part was to put stickers on it. It was hard to get convinced that the sticker could be peeled off easily. YES, IT DID!! ALHAMDULILLAH. In this Treasure Hunt organised by the ConvoFair committe of my university; we create an ally of 4 cars. Yeah, my car is the only non-Malaysian car, the most heavy car, the oldest car in the clan. What is the advantage of driving this car in hunt?? The turning radius!! U-turn here & there is a no no problem at all, swing! My car did not win. However 3 others got fourth, third, and second place. Yeah, they took us as an ally, so they kindfully share the prizes. Thanks guys.
This car managed to going up and down hill, tested in sharp corners on country roads. Yeah, great. Total distance travelled is nearly 300km. From UTP, Tronoh, the hunt ended in Taiping. Then we proceed to Bukit Larut for 'express' vacation. Small hiking there, and have fun at the waterfall. Then, going back to UTP. It was about 12 hours of driving, oh man, its tiring my eyes. Conclusively, its fun :)
To indicate whether the oil filter is original or not is not that difficult, though they are tricky. One can only be very sure of whether the oil filter installed is genuine part or not only after they start the engine, obviously if the oil filter is not the genuine one; NO CHOICE!!
Locally, in Malaysia, I have found few types of oil filters being sold;
Genuine VOLVO oil filter. The price of this filter may vary from RM25 and above. To recognize this filter is simple, it was labelled with VOLVO logo and some instructions, in DARK BLUE color! Again, to really sure, after installation, the oil pressure warning light will get off immediately after starting. This is because this genuine oil filter is fitted with oil pressure check valve that will maintain the oil pressure (so the light will not turn on).
MADE IN MALAYSIA, FAKED! This oil filter look pretty same as the original filter. It have VOLVO logo and the same printed instructions on it, but the text is FADED & in LIGHT BLUE color. Using this filter, the oil pressure warning light will remain on the dash for a few seconds after the engine started. This filter may priced between RM16-RM17.
MANNbrand oil filter. This may be an alternative for original VOLVO filters. It may cost around RM20.
Japan branded! This is the cheapest oil filter I have ever found claimed to suit VOLVOs. I have been offered RM7 only for this filter. Dare not to use it.
Why using original oil filter is very crucial? Did you realized that for 240, using mineral engine oil, the service interval is 10,000km! I have contacted Federal Auto, they confirmed this. Even until now, they keep the 10,000km service interval for 240s using mineral or semi-synthetic engine oil. This is where original oil filter play its role, good filtering! I have once used the MADE IN MALAYSIA filter, its just 5000km and the engine oil was so nice dark! And from then, I not dare to use any other brand of oil filter besides genuine one. GOOD LUCK!!
The 240 just get engine oil changed. We have decided to migrate from mineral based oil to semi-synthethis engine oil. For this service, I have to be independent; source out parts by myself and send for an independent mechanic to carry out the job.
I got oil filters from Ecco Trading Ipoh (VOLVO parts dealer). I also got washers for engine oil cap and drain plug from them. The engine oil used is the PETRONAS Syntium 800 Semi Synthethic 15W-50. We decided to stick on this brand for coming services. So from now on, I expect oil change to be done every 10,000km, meaning that only twice a year!!
Starting from last week these lights keep blinking.. They light up dimly, not so bright. If you did not really see them, you may not notice them. Upon rev up, those lights will slowly goes off. The lights are;
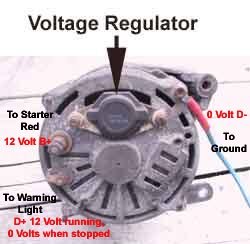
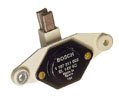
Then last night, I notice from car charging condition LEDs that I installed to 12V cigarette socket show no charging activity. Those LEDs was very useful since this model doesn't equipped with in-dash voltmeter. The car survived the journey, accesories started to dim off and wiper motor slowed down remarkably. Upon parking, the car dies, cannot restart again. To my wonder, with 10V showed on multimeter this morning, I managed to get it started. Drive to the nearest auto electrical shop and diagnosed with faulty voltage regulator. Changed it and there it is, the battery got charged again!!


.JPG)
.JPG)


.JPG)
.JPG)